So it's been a while since I've posted, but you know I've been getting in with taking pictures of the food I've been making. But with Thanksgiving and now Christmas coming, it's been so difficult to get on here to post! Not to mention, I just finished another semeter of school (29 MORE CREDITS to GO!!!!). Anyways...
I just wanted to wish you all a happy holiday... may it be peaceful, restful, and may love fill the air. We have so much to be greatful for... life... love... family... friends. Let us remember that even though we spend a lot of our time shopping for this holiday, that it should be more about telling your loved ones how you feel about them... giving them hugs... and just taking the time to say I love you.
In the new year, be on the look out for some FUN blog posts! I can't wait for 2012... and I bet it can't wait for me.
Onward and upward,
-Vince
Friday, December 23, 2011
Tuesday, November 8, 2011
This is the Remix #4 - Chicken Stock
This is… the last remix. With the holidays coming up, I thought that doing a chicken stock blog post would be well worth it. It seems that during the holidays, people buy the most chicken stock than other times of the year. You use it to make dressing (or stuffing as some call it), different rice dishes, or as a basting liquid for your turkey. It has so many uses, and at $2.50 for a 32 ounce tetrapack (tetrapack is a word I first heard in the Philippines, and it essentially means a juicebox), it may be worth it to you to make stock when you have a roasted chicken. Once again… a $5.00 pre-roasted chicken will make you at least 96 ounces of stock. Stock also freezes really well and can be defrosted quickly for when you want to make soup or add it to your favorite recipe. So how do we do this? Lehggo!
Once you have eaten everything you wanted off of your preroasted chicken, pick off the leftover meat off the chicken until you get to bare bones. Save the meat to make soup, chicken-salad sandwiches, or another remix meal (See Remix Meal #1).
Ingredients:
1 chicken carcass (I use the leftover bones from the pre-roasted chicken we had been eating off of for the week)
4 carrots, roughly chopped (notice, I didn’t even bother to peel them)
4 celery stalks, roughly chopped (greens and all)
2 peppers roughly chopped
1 onion, cut into quarters (once again, no need to peel)
1 clove of garlic (you can leave the papers on)
Water to cover (Usually about 10-12 cups).
 |
| Vegetables |
 | |
| Bones |
Put all of your ingredients into your largest stock pot. Put in enough water to cover your ingredients.
Place on high heat and bring to a boil. Once boiling, reduce to a simmer. (You can also do this in your crockpot if you don’t feel comfortable with leaving your stove on for long periods of time)

Now, depending on how intense you want your flavors to be in your stock, you can allow your stock to simmer all day (which will give you a more concentrated stock), or you can just simmer it for an hour.
As you simmer your stock, you will notice a thin film of scum (or as another blogger called it, “chicken foam”) that will start to collect around the edges of the pot. If you are worried about the clarity of your stock, go ahead and skim that off. For me… I leave it in because (1) its tasty and (2) I’m lazy.
Once you’ve gotten your desired flavor profile, cut off the heat and allow it to cool. Once you’ve cooled the stock, you want to strain out the veggies and the chicken bones. I do this with a slotted spoon. And if you aren’t clumsy, you can use a colander with another pot underneath to strain out your solids. You can eat the veggies if you want, but I don’t because they no longer have any texture. Essentially, they are mush. So toss them out along with the bones, they’ve done their job.

There are several methods of storing your stock. One method that I’ve learned is that you can freeze the stock into ice cube trays. In using this method, you can then take your chicken stock cubes, remove them from the trays once frozen and place them in a gallon freezer bag. For some, it may be easier to store the stock this way. For me, I only have 2 ice trays… and quite honestly… I only want ice in them. So what I do is save the large plastic containers that you get with your egg drop, wonton, hot and sour soups and freeze the stock in those containers. Right now, I have about 3 of those containers in my freezer, waiting for use!

You may also be wondering… “Vince, why didn’t you add any salt or pepper to your stock?” Trust me, there’s a method to my madness. I leave my stocks salt and pepper free because I use the stocks as an ingredient for other dishes. If I add salt and pepper to the stock, I run the risk of over-seasoning the foods I plan on making later.
Chicken stock is one of the best ways to use all of your chicken parts and get rid of your leftover veggies. Since lately I’ve been doing a lot of food shopping at warehouse stores, I am always afraid that the veggies and things are going to go bad before I can get around to using them. So before that happens, make stock. You don’t have to be limited by the vegetables I’ve listed for you. You aren’t limited by just chicken bones. If you use have short-ribs or marrow bones, use those to make a beef stock. If you have a bunch of scallions that are about to go on you, throw them in the pot! If you have fresh herbs that are starting to get dry and brown on you, throw them in the pot! If you find yourself with a hambone after a holiday meal, make stock out of that! Stocks are so versatile, its worth the time and effort.
Onwards and upwards,
Vince
Thursday, November 3, 2011
This is the Remix Meal #3 - Pizza Muffins
THIS IS THE REMIX…If you are like me, when you make your favorite spaghetti meat sauce, you make entirely too much of it. In my case… I make a lot so I can freeze some and have some for the week’s meals. But you can only have spaghetti bolognese so many times in a week! So how do you remix it? I turned my bolognese sauce into PIZZA MUFFINS.
Keep in mind, this recipe isn’t completely like pizza in that it doesn’t have the classic pizza toppings. However, there is NOTHING stopping you from using classic pizza toppings. This is just a method. You can adjust it to your liking and your favorites.
Lehhgo!
Ingredients
1 package of premade pizza dough (I used the pop-can style by Pillsbury)
½ cup of your favorite sauce (I used my own bolognese sauce)
¼ cup of ricotta cheese
¼ cup of mozzerella cheese (Reserve a bit on the side to top your muffins)
¼ cup of cheddar cheese
1 Muffin Tin greased with a bit of non-stick spray
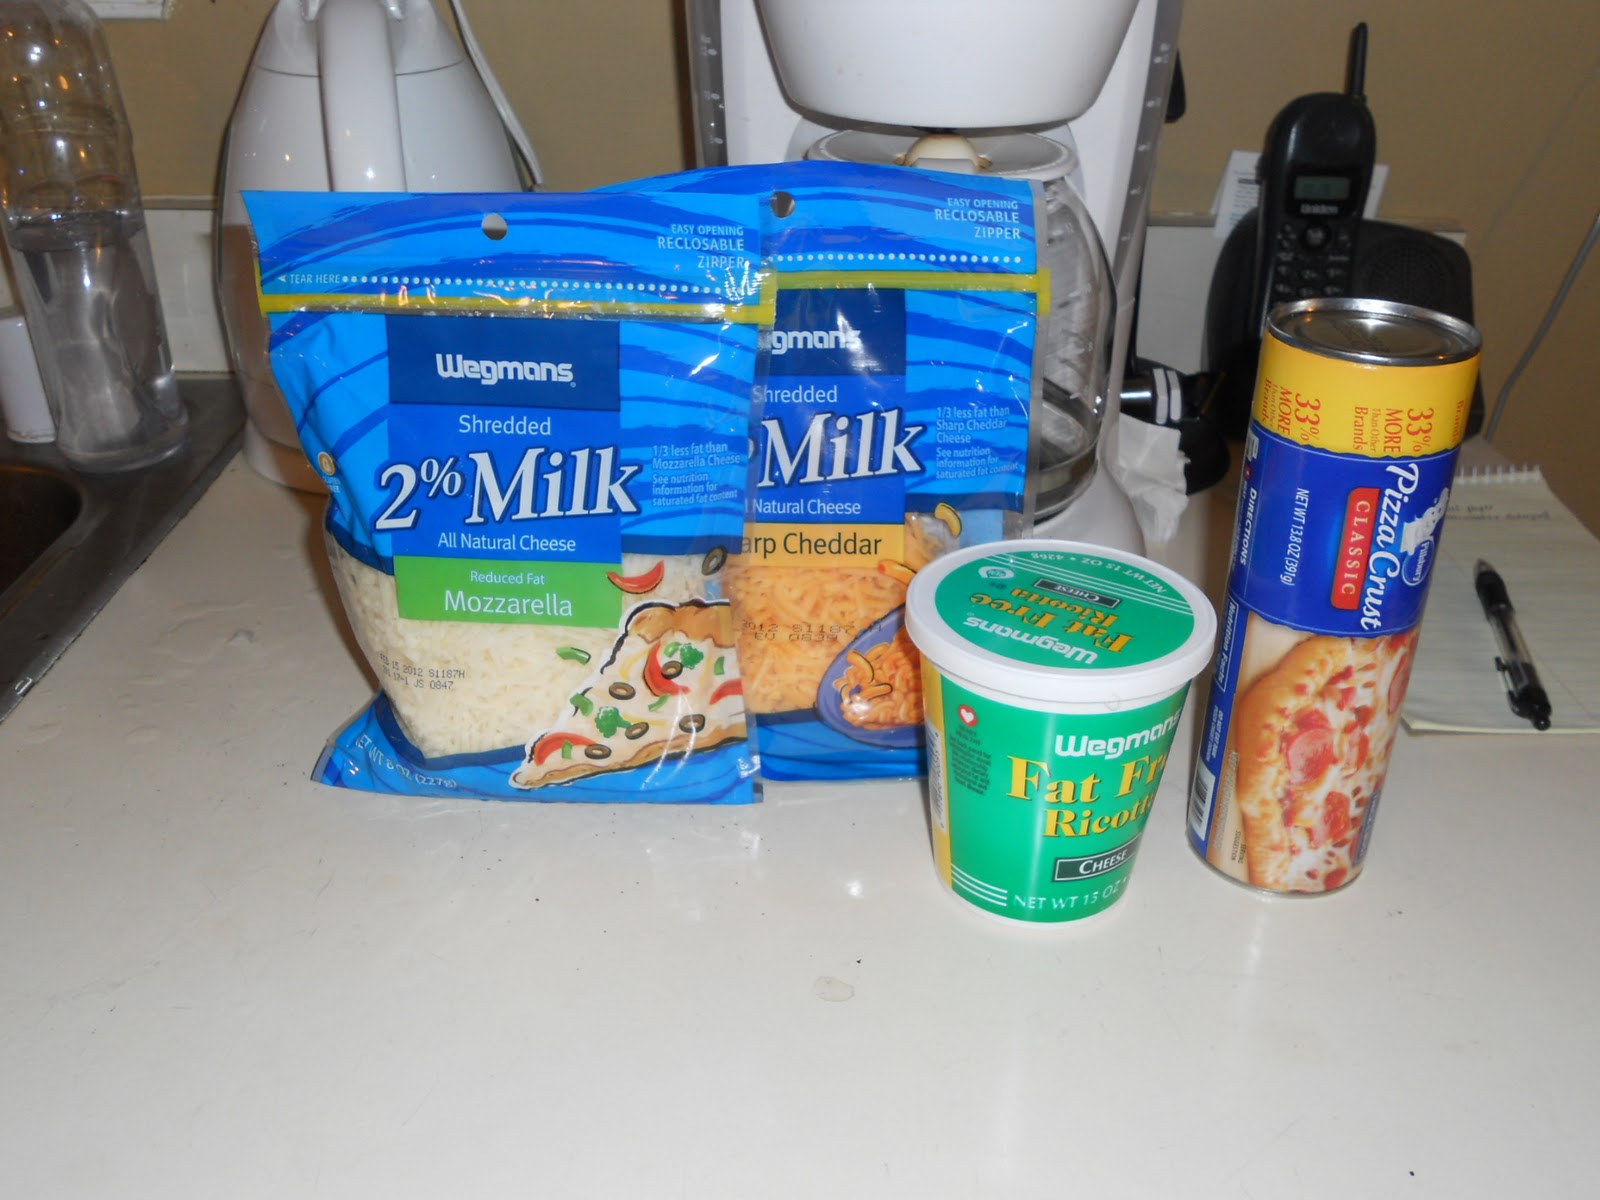 |
| Mozzerella, Cheddar, Ricotta, and Pizza Dough |
 |
| Pizza dough |
 |
| Bolognese Sauce |
Unroll your pizza dough and cut it into six pieces. Roll out these pieces so that they fit into the holes of the muffin tin and that they create cups. Bake this per the directions on the package of pizza dough. Just a tip, I baked the cups for 5 minutes longer than the package instructions to ensure that you have a fully cooked cup.
 |
| Pizza Dough in the Muffin Tins |
While your muffins are in the oven. Combine the rest of your ingredients together. What you are looking for is a soft mush… the consistency of mashed potatoes. If you find that your mixture is too wet, add a bit more ricotta to get the proper consistency.
 |
| Bolognese, and Cheese Mixture |
Remove muffins from oven. Now that you have a “cup”, fill them with the mixture you just made and top with the reserved mozzerella cheese. Place back in the oven for 8-10 more minutes, or until the cheese mixture is all melted and gooey.
Remove from oven and there you have it… PIZZA MUFFINS!

Serve with a side salad.

When I tell you that the pizza muffins were ridiculously good! I’m not lying. And they were so quick to make!
Try it out!
Onwards and Upwards,
-Vince
Tuesday, October 18, 2011
This is the Remix Meal #2 - Vegetable Frittata
In my P. Diddy voice “This is the remix…”. A couple of weekends ago, my partner was in charge of making the protein for Sunday dinner, while I was in charge of sides. So we had rice (of course...LOL) and steamed veggies. My veggie medley included julienned carrots, peppers, onions, frozen broccoli florets, and a few cloves of garlic, mixed with a bit of olive oil, salt, and lemon pepper. All of this was thrown in the microwave for about 6-7 minutes, mixed once about halfway through the cooking process. But as we sit in the afterglow of fullness, I wonder, “What the heck am I going to do with those leftover steamed veggies?” And there we have it… the vegetable frittata.
You may ask, what in the world is a frittata? It is an open-faced Spanish omelet, or as I like to call it, a “man-quiche”, since you don’t have to bother with rolling out a pie-crust to make this happen. So let’s get started!
Leftover steamed veggies (your favorite mix will always work)
6 whole eggs, cracked and beaten
½ cup of milk
1 tbsp. of dried parsley
Salt and Pepper to taste
Non-stick spray
1 tsp. of butter
 |
| Leftover steamed veggies |
 |
| Eggs |
1 Glass (Pyrex) pie plate
Preheat your oven to 400 degrees.
In a bowl, beat your eggs and beat in your milk. Then add your salt, pepper, and parsley. Set this mixture aside.
 |
| Bout to beat the eggs! |
Next, prepare your pie plate by lightly spraying it with your non-stick spray. Now, this may seem extra fat, but there is actually a purpose to what I am about to do. Take your teaspoon of butter and rub the bottom and sides of your pie-plate with it. Your are doing this to add a bit of that butter flavor to your frittata, without having to actually add butter to the frittata itself.
Place your steamed veggie mixture in the bottom of the pie-plate, ensuring that your vegetables create an even layer.
 |
| Veggies in your pie-plate |
Pour your egg mixture over the top of the veggies, ensuring that the eggs seep into every crack and crevice of the eggs.
 |
| The beginnings of a frittata |
Cook in your preheated oven for 30-45 minutes, or until your eggs have completely set and are lightly browned on top. Serve this with your favorite grain or a salad for lighter fare.
 |
| All Done! |
 |
| Are you ready to eat? |
 |
| Come and get it! |
The beauty of this dish is, you can add just about anything to your frittata. Have a bit of leftover grated cheese? Throw it in there! Do you have some leftover steak? Chop that up and throw it in there! Are your fresh herbs wilting on you? Throw it in your frittata!
All I have to say is, experiment, experiment, experiment! And EAT THOSE LEFTOVERS!
Onwards and upwards,
-Vince
Sunday, October 2, 2011
"This is the REMIX" Meal #1 - Chicken Pesto Pasta with Asparagus!
In these tough economic times, we have to consider ways to save ourselves some money. No one ever said that you couldn’t eat well on a budget… and damn near gourmet too! How many of you all buy those pre-roasted chickens from the grocery store? In a bind, I definitely do. And honestly, at less than $7 a bird, it’s a pretty good value for something that is already pre-made. But, are you like me and get tired of eating the chicken after a while? Well… here’s a great remix meal for you…
1 cup of cooked chicken (pick the meat off of your pre-roasted chicken when you get tired it)
1 cup of asparagus, chopped at an angle
½ box of spaghetti, boiled per the box directions
4 tablespoons of store-bought pesto sauce (this is a great value, and keeps really well in the fridge)
1 tbsp. of butter
1 tbsp. of olive oil
1 tsp. of chili flakes
1 tsp. garlic powder
1 tsp. onion powder
salt and pepper to taste


In a large pot, boil your water for your pasta. Drop your pasta in the boiling water, stirring occasionally. Takes about 8 minutes for al dente pasta.
While your pasta is cooking, heat up a frying pan. Melt your butter into the olive oil in this pan. Add in your asparagus and spices. What you are looking for here is for your asparagus to get tender.

Once the asparagus has gotten to your desired tenderness, turn down the heat and throw in your chicken. You just want the chicken to warm through.
Now… drain your pasta, reserving a half-cup of the cooking liquid. (You’ll see what we are going to do with it in a few.)
Take your pasta and add it to the frying pan with your asparagus. Add in your pesto sauce, and let everything combine and warm through. If you find that you are having a hard time incorporating your pesto, throw in a few teaspoons of the reserved pasta water. This should loosen your pesto enough to get better coverage on your pasta.

Serve it up and enjoy!
Onwards and upwards,
-Vince
Sunday, September 25, 2011
Leftovers and Saving Dollars
In this day and age of recessions and folk trying to save money, I think it’s really important to do your best to save money by not wasting food. I mean, we spend so much money each year on food, why not make the most of it? I know for some, it’s really difficult to get through leftovers… by the end of the week… most people are tired of eating that same spaghetti, meatloaf, or grilled chicken breasts. So what do you do? You can’t stop cooking (cooking is one of the BEST ways to save money) and you HAVE to eat the food! Well, here are a couple of tips.
1. At the beginning of each week, try to make two or three different entrees, so that they can be alternated throughout the week. You can bring these leftovers for lunch as well and not feel like you are eating the same things over and over again.
2. Trade up your side dishes with these entrées. Sometimes switching your side from a salad to buttered noodles really makes a difference!
3. Use EVERY part of the food you buy. For example, when you roast a chicken, once all the meat is eaten, use the chicken carcass to make your own homemade chicken stock. Save the tough ends of your asparagus, they can be the base for an asparagus soup. There are TONS of ways to use every part of the food you buy.
AND…. MY FAVORITE TIP…
4. (In my P. Diddy Voice) THIS IS THE REMIX. There are ways to take your leftovers and turn them into whole other meals. Let’s say you have leftover steamed veggies and you have no idea what to do with them. Use them on top of your favorite salad greens to bulk up your salad. Or take them and add them to a frittata (Spanish omelet). Do you have leftover grilled chicken? With a cup of chicken stock and a cup of your favorite barbecue sauce, you can create a quick pulled chicken to be put in between your favorite Kaiser roll. Leftover meatloaf? Chop it up, add some tomato paste and a bit of water, and you have a sauce to go over spaghetti. And let’s not forget, the sandwich. Most entrees can be turned into a sandwich.
I write this to say, be creative with your food. These are some great techniques that you can use to save money and to get through your leftovers! Be on the lookout for my recipes for remixes!
Onward and upward,
-Vince
Saturday, September 24, 2011
Quinoa Pilaf
So, how many of you have ever heard of quinoa? For my foodies, quinoa is what my health conscious aunt would call a “Super food”, not only containing carbohydrates but containing 14 grams of protein per 100 grams!
Kinda crazy right? What’s great about it is, it cooks just like rice and can be used in the same ways rice would be used. So, here’s my recipe for quinoa pilaf.
2 cups of quinoa
4 cups of chicken stock
1 packet of chicken base (Yeah… I ganked that out of a pack of ramen noodles, DON’T JUDGE ME! LOL)
1 celery rib, diced
1 cup of frozen peppers
1 cup of frozen spinach
1 tbsp. garlic powder
1 tbsp. onion powder
1 tbsp. dried parsley
1 tbsp. olive oil
salt and pepper to taste


 |
| Chicken base... hahahahahahaha! |


Heat the olive oil in a pot and lightly toast your quinoa. About 2 minutes. Doing this helps to develop the flavor of the quinoa. You can also do this with rice or any other grain you cook.

Then add in your celery and sauté it allow it to soften. This will impart that light celery flavor that a lot of people love. Takes about 2 minutes.
After you’ve toasted the quinoa and , add in your chicken stock. Bring the liquid to a boil, and reduce to simmer, stirring it every so often. Add in your seasonings. Simmer for about 10 minutes covered, until the liquid starts to become absorbed by the quinoa.

At this point, drop in your frozen veggies, stir, and allow them to cook for another 10 minutes with the quinoa, or until ALL the liquid has been absorbed by the quinoa.
Turn off the heat and fluff with a fork. This side dish goes great with grilled chicken and fish. Try something new!

Onward and upward…
-Vince
Crockpot Beef Stroganoff
With the coming of cooler fall weather (and the donation of a beef roast to us by my mother… HI MOM!!!), I got inspired to make something in my trusty crockpot. This is a rendition of a recipe that I saw on Food Network’s 5 Ingredient Fix . I’ve never been the 5 ingredient kind of guy, but hey… it definitely got me inspired. So… LEHGGO!
1 Beef Roast (Any size)
2 tbsp of olive oil
1 Cup of Onions
4 cloves of garlic
1 Shallot
1 can creamed soup (I used cream of chicken)
1 cup of mushrooms
1 cup of frozen peas
1/2 cup of white wine
2 cups of vegetable stock
1 tablespoon of dried parsley
1 tbsp. of cornstarch
1/2 cup of water
Salt and Pepper to taste
Season your beef roast with salt and pepper. In a hard bottomed pan, sear off the roast on all sides in 1 tbsp of olive oil. Takes 3-4 minutes on high heat.
Remove the roast from the pan and place into crock pot.
In the same pan you've seared the roast in, saute your onions, garlic and shallots in the 2nd tbsp of olive oil. Deglaze the pan with the white wine and vegetable stock, ensuring to scrape up any brown bits on the bottom of the pan. Add your can of creamed soup. Bring to boil, the reduce to simmer for about 5 minutes. Turn off the heat and add the liquids to the crock pot.
Place the crock pot on low for 5-6 hours or until you can shred the meat. Once cooked, remove the roast from the stock pot and shred the meat.
Make a slurry out of the cornstarch and water, combining the two thoroughly so that there are no lumps. Add this to the stock pot liquids to thicken the sauce. Once thickened, add in your mushrooms and peas and return the meat back to the pot. Turn off the crock pot and allow the meat, peas, and mushrooms to heat back through.
 |
| Crockpot Beef Stroganoff |
Serve with buttered noodles. Making the buttered noodles was SIMPLE.
1 lb. bag of egg noodles
1 tbsp. of butter
1 tbsp. of dried parsley
Boil the noodles in salted water for about 8 minutes. Drain the noodles. In the same pan, use the residual heat from the pan to melt the butter. Add the dried parsley to the butter. Return the noodles back to your butter and combine. Voila! Buttered Noodles!
 |
| Buttered Noodles |
Pour your stroganoff over your buttered noodles and enjoy!
 |
| Yummo! |
Onward and upward…
-Vince
Sunday, September 11, 2011
Coupons and What They’re Used For
Hey everyone!
In an effort to save cash these days in this completely effed up economy, I have started couponing. No where near the extreme stuff you see on TLC’s Extreme Couponing Extreme Couponing, but just attempting to save some money here and there. It’s amazing the types of deals that one can get just by going through your Sunday circulars. Just make sure they are things that you use. In my case, as you’ve seen from my blog, I use a lot of bottled tomato sauces and pasta, so the coupons that I find in the Sunday advertisements really saves me a little bit of money. And quite honestly, it’s kinda relaxing clipping coupons on Sundays…
Try it out… just make sure the coupons are for items you use… otherwise, you are just being wasteful.
Onward and upward,
-Vince
Tuesday, August 16, 2011
Curried Cabbage
Have you ever bought a head of cabbage and had no idea what to do with it? I mean, people braise it and stir-fry it, but somehow it always ends up tasting the same; kinda bland. Well here’s a great recipe for those that want to amp up the flavor on your cabbage dish! Let’s do this…
1 Small head of cabbage with the core removed and sliced
2 carrots, peeled and sliced on an angle
1 half of a large onion, sliced
2 cloves of garlic, chopped
3 strips of bacon, chopped
1 cup of chicken broth
3 tbsp. of curry powder
1 tsp. salt
1 tsp. pepper
1 tsp. red chili flakes (or to taste)
1 capful of apple cider vinegar
a few dashes of worcestershire sauce
a few dashes of hot sauce (of your choice)
½ cup of frozen peas
 |
| Cabbage |
 |
| Bacon |
 |
| Onions, Garlic and Carrots |
 |
| Chicken Broth, Worcestershire Sauce, and Hot Sauce |
In a pot over medium heat, render the fat of the bacon. Sautee for 5 minutes, or until the bacon is crisp.

Add in your onions and carrots and allow them to sweat in the bacon fat. Once your onions are translucent, add in your dry seasonings. Then add in your cabbage.

Once your cabbage has begun to sweat and get tender, then add in your chicken stock and the rest of your liquid spices. Simmer on low, covered for about 15 minutes.
At the very last minute, add in your peas and cook for one more minute.

Voila! Curried Cabbage.

Serve as a side dish, or as the main course, over rice or your grain of choice!

Enjoy!
Onward and upward,
-Vince
Wednesday, August 10, 2011
The Beauty of Saturday Breakfast...
In previous posts, I’ve talked about the memories that a certain Filipino breakfast brings me. But I never really talked about how a home cooked breakfast, no matter what it is, makes me really feel. After a long work-week of instant oatmeal, hardboiled eggs, and pay-by-weight steam tray “country breakfasts”, I take pride in cooking a homemade breakfast.
One of my earliest memories (Well hell!!! This is a pretty recent memory!!!!) is the memory of waking up on a Saturday morning (never Sunday mornings because we were rushing to get to Church) to the smell of bacon frying, the sound of sausage cooking, and to the pouring of the occasional flapjack onto a cast iron griddle. I would wipe the sleep from my eyes, throw on my slippers, and rush downstairs to set the table so that we could sit down and eat.
With my father sitting at the head of the table, my brother and sister sitting across from me, and my mother sitting by my side, we would sit at the table and have discussions about everything. My brother and father would argue about the simplest things; how algebra works or the inner workings of the car, while the rest of us sat by and watched them go at it. My sister and I would go back and forth from the table, refilling platters with whatever breakfast food needed to be refilled.
When my mother had enough of the back and forth bickering between my brother and pops, she would sit with her face smooshed up and say “OK. STOP IT NOW.” Man… the memories.
This memory is cool, don’tchathink? Well, here’s something even cooler. We still do this. My family is a busy one; the Valle kids have moved out of the house, my sister has a family of her own, including her husband and her 3 kids, myself with my partner, and my brother with his girlfriend, we all make attempts during holidays to replicate this. We all meet at Casa de Cascade Lane and breakfast happens.
When my nieces and nephews stay with my parents overnight, my parents wake up first thing in the morning and make breakfast for the kids, the same way they did for us when we all lived in the house.
As I’m writing this, tears of joy are starting to well in my eyes, because I now have a tradition to pass on to our children.
 |
| Saturday Breakfast |
Onward and Upwards,
-Vince
Tuesday, August 9, 2011
Chicken in Mushroom Thyme Sauce
Do you ever have issues trying to figure out what to do with your chicken breasts? Do you ever feel like you are constantly making the same dishes with chicken breast? After going through my shelf of cookbooks, I came across my Campbell’s Kitchen Recipe Collection.
 |
| The Campbell's Kitchen Recipe Collection |
Now… I’m never really good with staying true to the recipe in the book, because I like to cook by what I have in the cupboards. So here’s my rendition of Campbell’s Fish & Vegetable Skillet, only made with chicken and veggies that I had laying around.
4 chicken breasts, cut into bite-sized cubes
4 celery stalks, chopped
4 carrots, peeled and chopped
1 half of a large onion, sliced
4 cloves of garlic, finely chopped
1 tbsp. granulated garlic
1 tbsp. granulated onion
1 tsp. salt
1 tsp. pepper
1 tbsp. of dried thyme
1 tbsp. of dried parsley
1 tsp. of red pepper flakes
1 tsp. of paprika
1 tbsp. olive oil
1 tsp. of worcestershire sauce
1 cup of chicken broth
1 can of cream of mushroom soup
½ cup of water
 |
| 4 chicken breasts, cubed |
 | ||
| Carrots, Celery, Onions and Garlic |
 |
| Chicken Broth, Olive Oil, Worcestshire Sauce, and Cream of Mushroom Soup |
 |
| All the herbs and spices |
Now that you have the ingredients… lets get it in with the process!
In a hard-bottomed pot, heat up the olive oil over medium heat. Once hot, add your chicken to pot and allow to brown on all sides. About 5 minutes.
 | ||
| Browning chicken |
As your chicken is browning, add the red pepper flakes, salt and pepper.
 |
| Browned chicken with spices |
Once you’ve browned the chicken, add in your vegetables and allow those to sweat and release their liquid. Cook for about 3 minutes.
 |
| Chicken and veggies |
Once you’ve cooked the vegetables for a minute, add in all of your liquids, the can of cream of mushroom soup and the rest of your herbs and spices.

Bring to a boil then reduce to a simmer. Cover and cook for another 20 minutes. This should be plenty of time for the flavors to meld and be merry.
After your 20 minutes is up, uncover and turn off the heat. Let the dish stand for about 10 minutes so that the sauce thickens up.
 |
| Thickened and reduced sauce |
Serve with your favorite starch… As you can see, I have an affinity for rice (Duh… I’m the Filipino Foodie), but this dish will go great on a baked potato, with a side of buttered noodles, or even a few croutons.

I love this dish because it’s a quick cook. It’s flavorful, savory, and can feed an army. It’s even better the next day!
Try it out!
Onward and upwards,
-Vince
Subscribe to:
Posts (Atom)